 Relic
Guide
How to restore old photos at home
Restoring an old photo starts with a good digital copy. Once the print is scanned or photographed well, you repair the damage on the copy, never on the original: dust and scratches, fading, tears and stains, soft faces. Then you save it, print it and keep the original safe. Here's the process, step by step.
Before and after
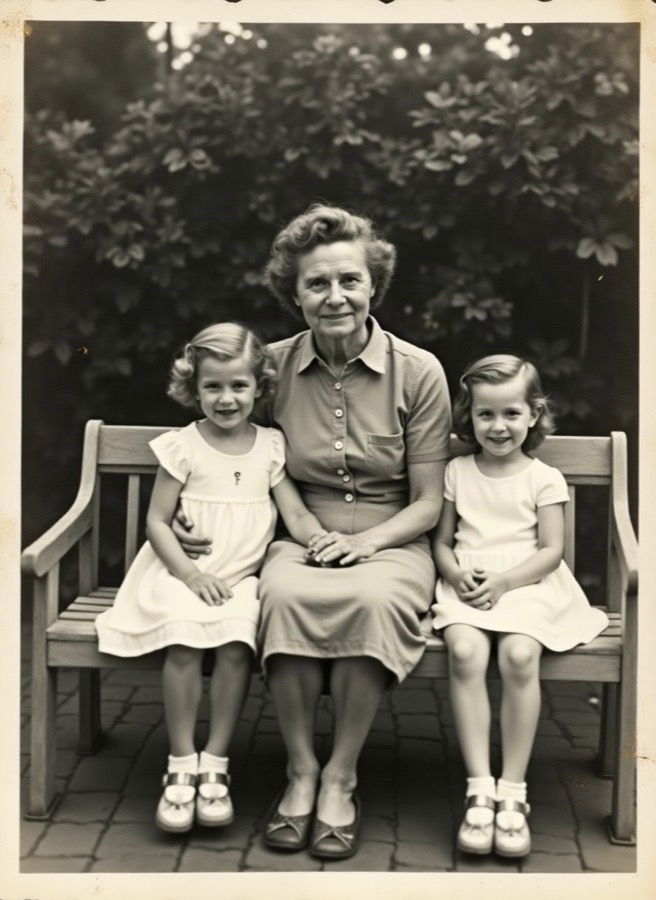
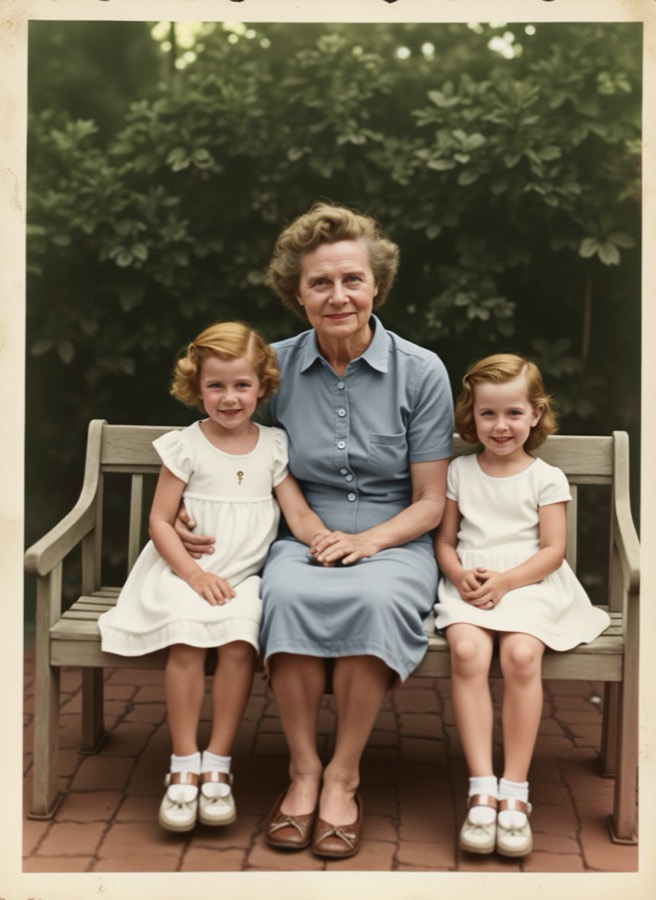
Handle the print gently
Old prints are fragile, and the surface marks easily.
How to do it: Hold it by the edges with clean, dry hands. Remove loose dust with a soft brush, and don't use water or cleaning products on it.
Make a good digital copy
Every repair happens on the copy, so start with the best one you can make.
How to do it: Use a flatbed scanner at 600 dpi or more if you want to print it larger, or photograph the print flat in daylight with the flash off. How to scan old photos with your phone
Remove dust and scratches
Specks, hairlines and cracks are the most common damage.
How to do it: Use the spot healing tool in a photo editor, zoomed in, a little at a time.
Fix fading and yellowing
Faded prints lose contrast and often turn yellow or magenta.
How to do it: Adjust contrast first, then correct the color cast; small changes look more natural.
Repair tears, stains and creases
These take the longest, because missing detail has to be rebuilt.
How to do it: Copy texture from nearby areas, and go slowly around faces, comparing often with the original.
On an iPhone, start with the Photos app
The built-in editor is free and can lift fading and a yellow cast, though it can't rebuild tears or missing detail.
How to do it: Duplicate the photo first, then tap Edit and try Auto, Contrast and Warmth on the copy. Keep changes small and compare with the original.
Let a tool do the repair
Relic repairs scratches, fading, tears and soft faces from a phone photo of the print in about 20 seconds, and can add natural color.
How to do it: Add the photo, choose color or black and white, and download the result in full resolution. Restore a photo with Relic
Colorize, if you want
Color can make an old photo feel close, but the colors are an estimate.
How to do it: Keep a black-and-white version as well. How to colorize black and white photos
Save, print and keep the original
Save the restored file in two places and keep the original print safe.
How to do it: Print on good photo paper, and store the original away from light, heat and damp. How to store old photos safely
Bring your old photos back. Add one old photo and get it back restored in full resolution, ready to print.
Restore my photoQuestions
How do I restore old photos on my iPhone?
Photograph the print flat in daylight with the flash off and fill the frame. For fading, duplicate the photo in the Photos app and adjust Auto, Contrast and Warmth on the copy. For scratches, tears and soft faces, open Relic in Safari, add the photo and download the full-resolution result.
Can I fix old photos on an iPhone for free?
The Photos app's editor is free and handles fading and color casts. Repairing tears, cracks and missing detail needs a retouching or restoration tool.
Can I restore old photos myself?
Yes. Make a good scan or phone photo, then repair dust, scratches, fading and tears on the copy with a photo editor or a restoration tool. Never work on the original print.
Should I clean an old photo before scanning it?
Only remove loose dust with a soft, clean brush. Don't use water, cloths or cleaning products on the print. For a valuable or badly damaged original, ask a photo conservator.
How long does it take to restore an old photo?
By hand in a photo editor, from minutes to hours, depending on the damage. With Relic, about 20 seconds after checkout.
More from Relic
Updated October 29, 2026